Adding and Managing Installments on Enerpize
Through Enerpize, you can add an installment agreement to invoices, streamlining the installment process and facilitating payment. The system automatically reminds customers of their installments regularly, helping you collect timely payments without delays. Additionally, you can download the agreements and installments in an Excel file for continuous tracking.
How to Add an Installment Agreement to an Invoice
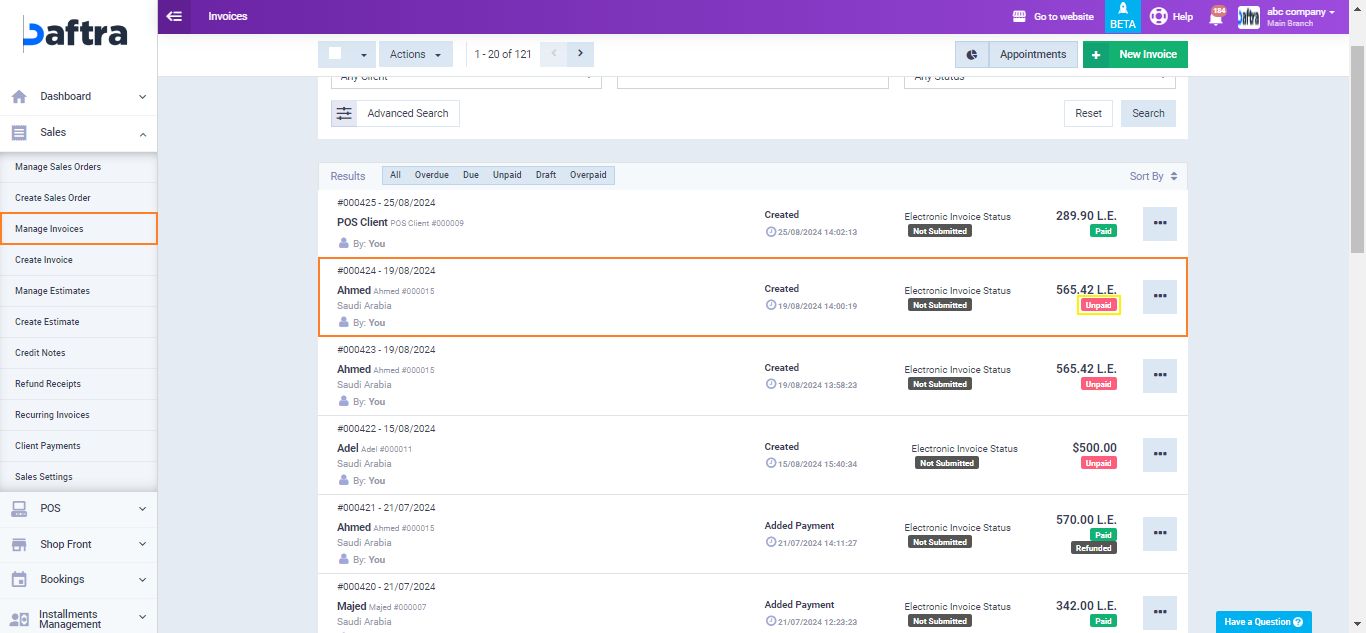
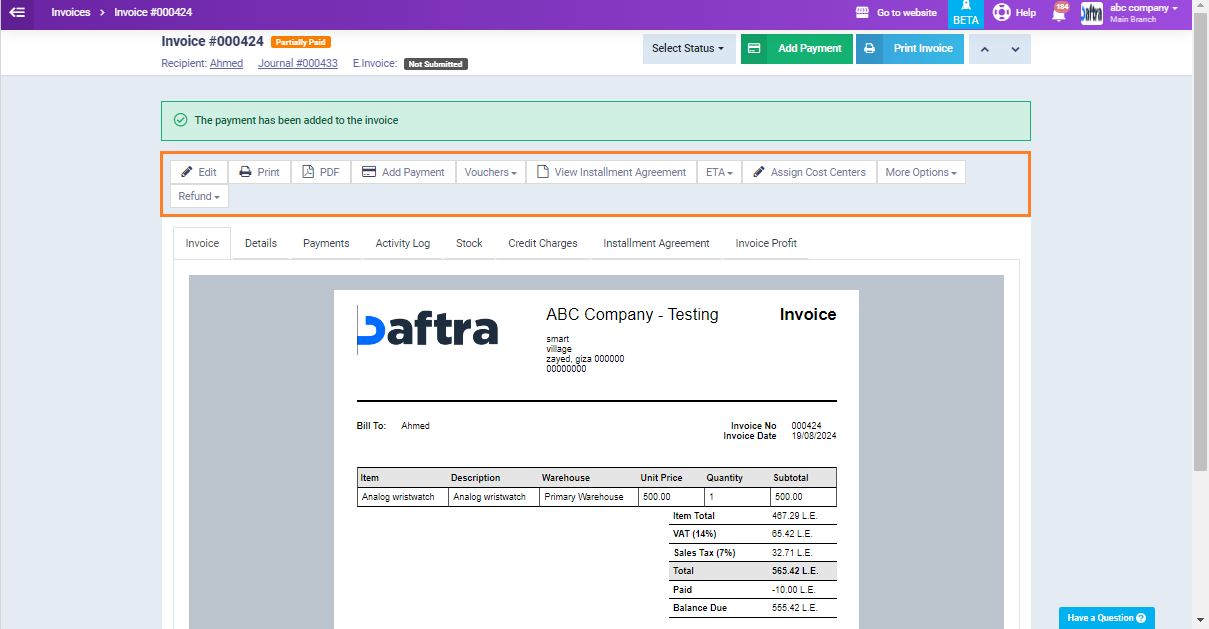
Click on “Manage Invoices” under the “Sales” dropdown menu in the main menu, and select the invoice to which you want to add an installment agreement, provided that this invoice has not been fully paid.
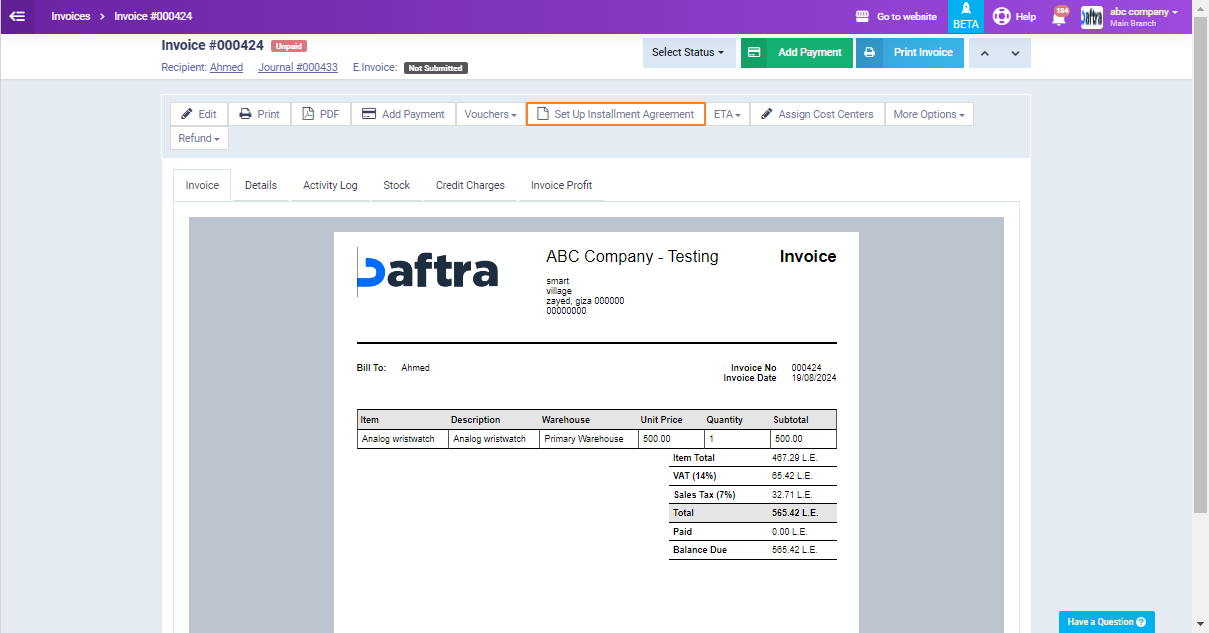
Click on the “Set Up Installment Agreement” button.
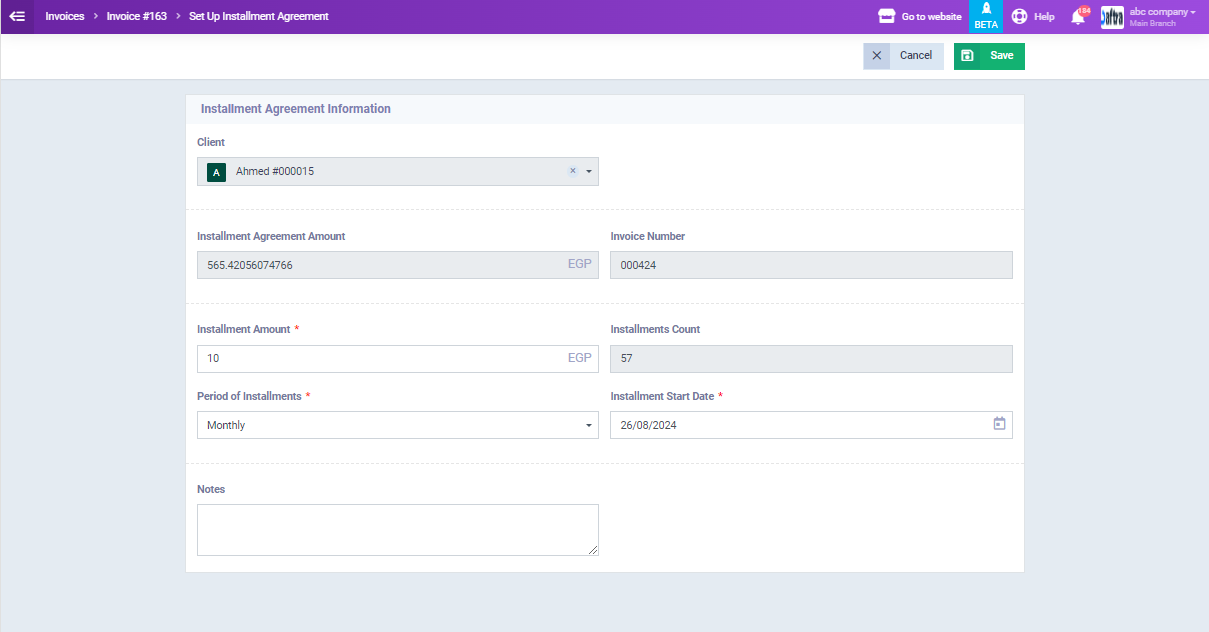
Enter the required data to create the installment agreement as follows:
- Installment Amount: Enter the amount the customer will pay at each installment due date.
- Period of Installments: Select the customer’s payment frequency from the list, choosing between (Weekly, Bi-Weekly, Monthly, Quarterly, Semi-Annually, and Annually).
- Installment Start Date: Select the date from the calendar when the installment payments will begin.
- Note: The system will automatically calculate the number of installments based on the installment amount and the total amount to be paid. The end date will also be automatically calculated based on the number of installments and the period of installments you selected.
- Notes: Enter any notes related to the installment agreement, if any.
- Click the “Save” button.
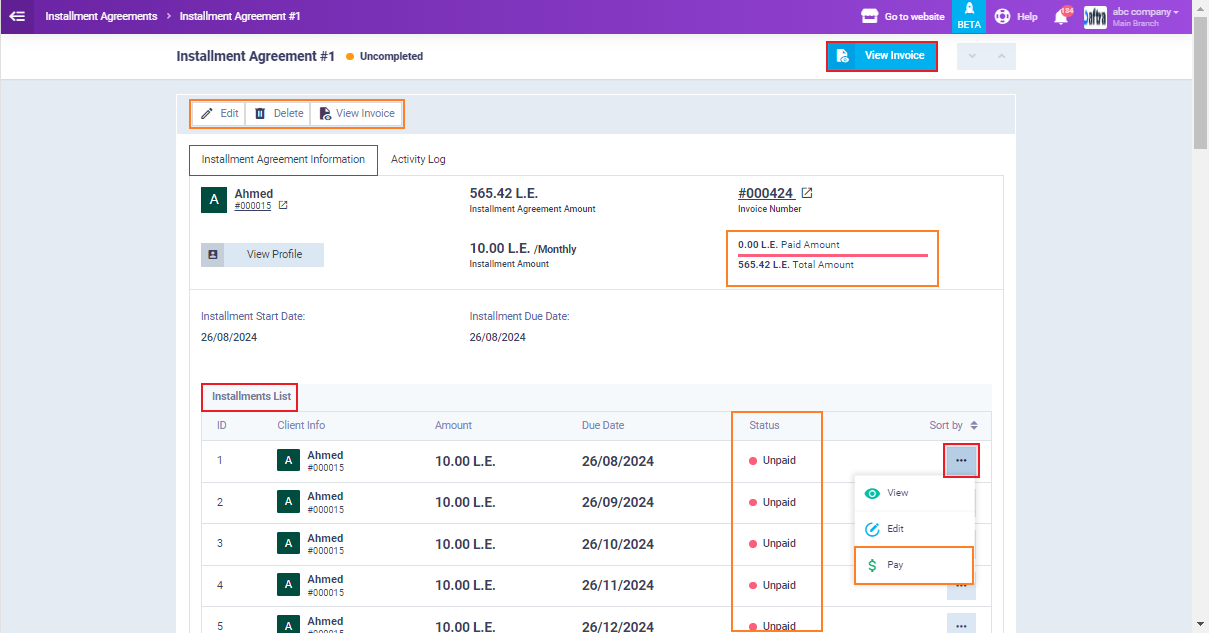
After adding the installment agreement, you can view the details related to it, including the total amount to be installed, the installment amount, and the amount paid from the total, and you can also review all installments related to this agreement.
Also, you can perform some actions on the installment agreement, such as:
- Edit the installment agreement.
- Delete the installment agreement.
- View the invoice related to the agreement.
Exporting Installment Agreements to Excel
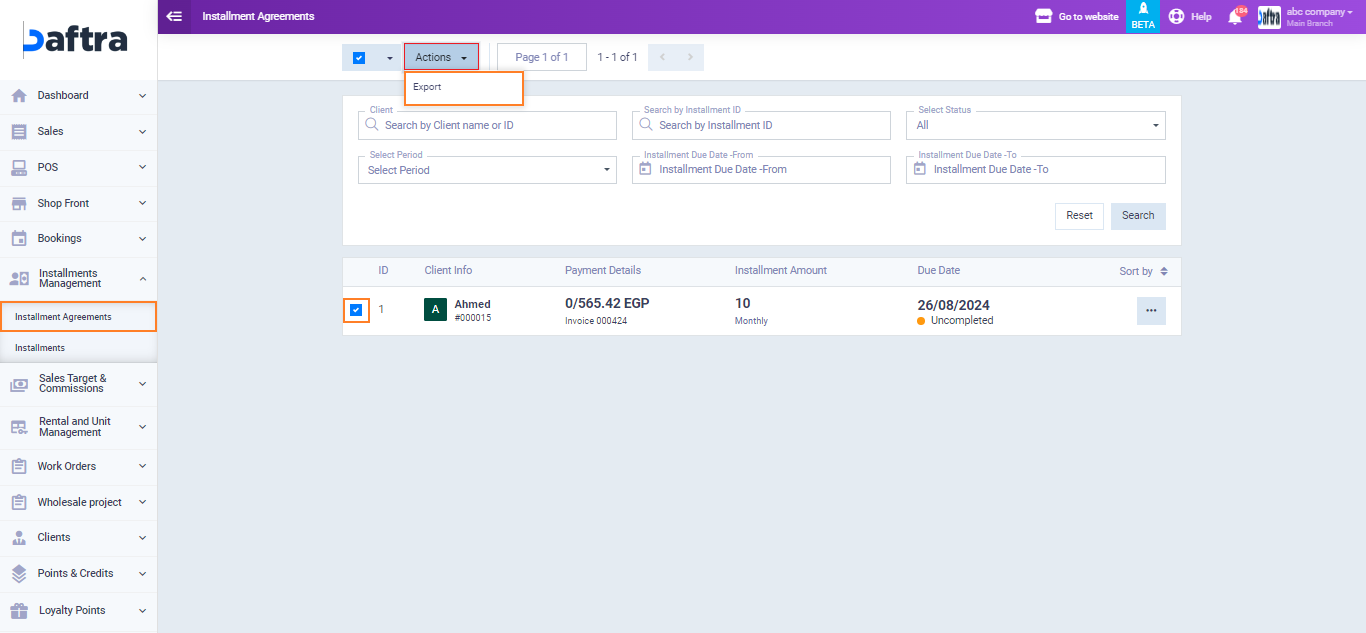
Select the details of the installment agreement that you want to include in the Excel file, and then click on the “Export” button.
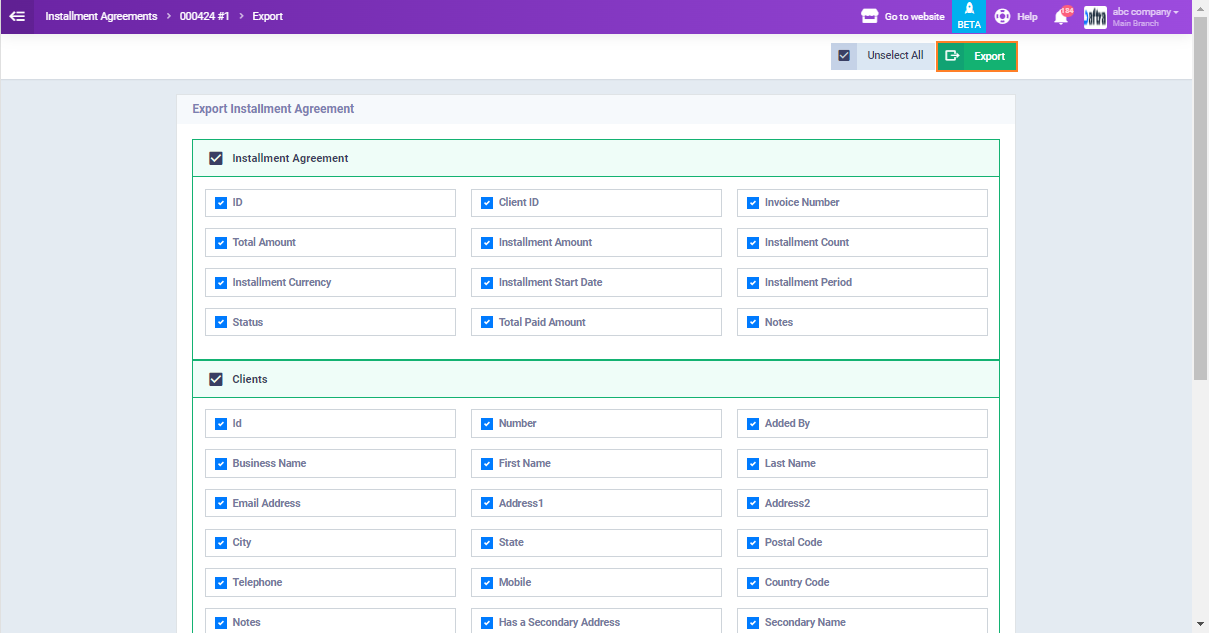
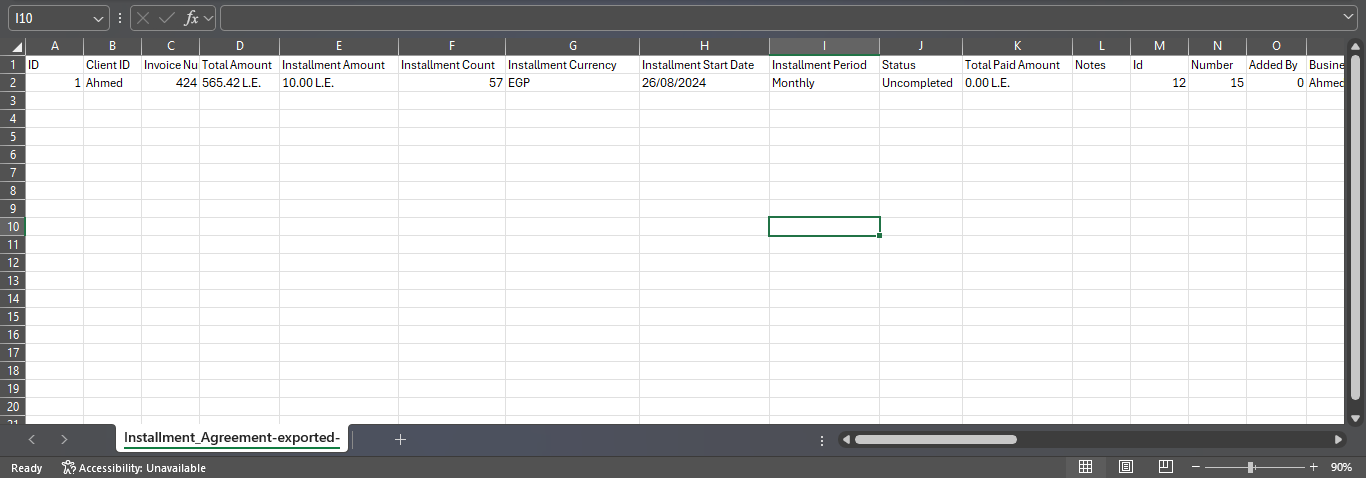
You will find the Excel file on your device in the following format; click on it to view.

The data for the installment agreements you’ve downloaded will appear on your device in the following format:
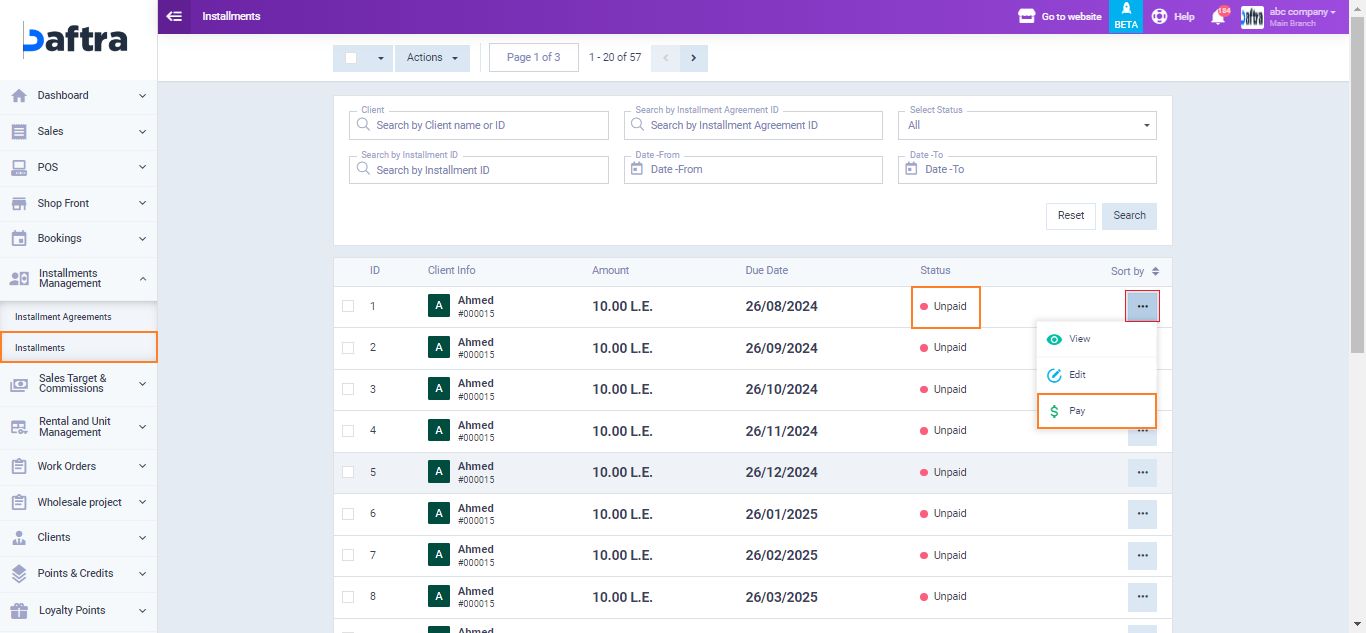
Adding a Payment for an Installment
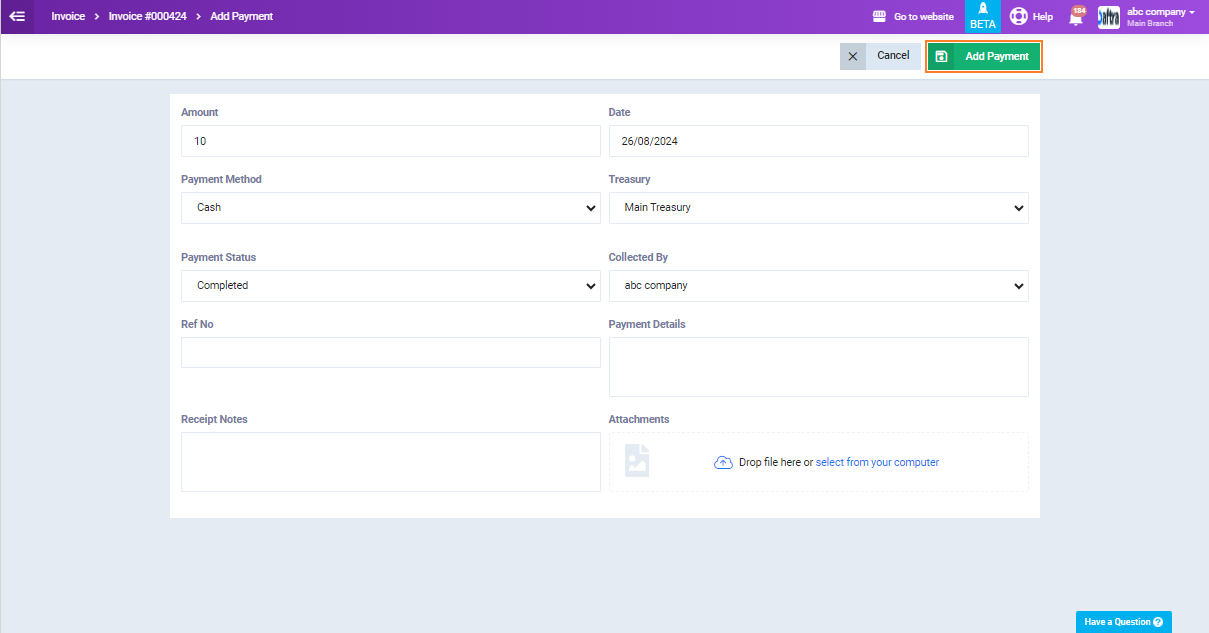
- Adjust the payment information for the installment as required. For more details on how to add a payment, please refer to the “Add Payment on Invoice” guide.
- Click the “Add Payment” button.
- The system will update the installment status from “Unpaid” to “Paid” and will apply the payment amount to the invoice data, reducing the outstanding amount accordingly.
After paying the installment, you can perform several actions, such as editing it, sending it to the customer via email or WhatsApp, and other available options.
Exporting Installments to Excel
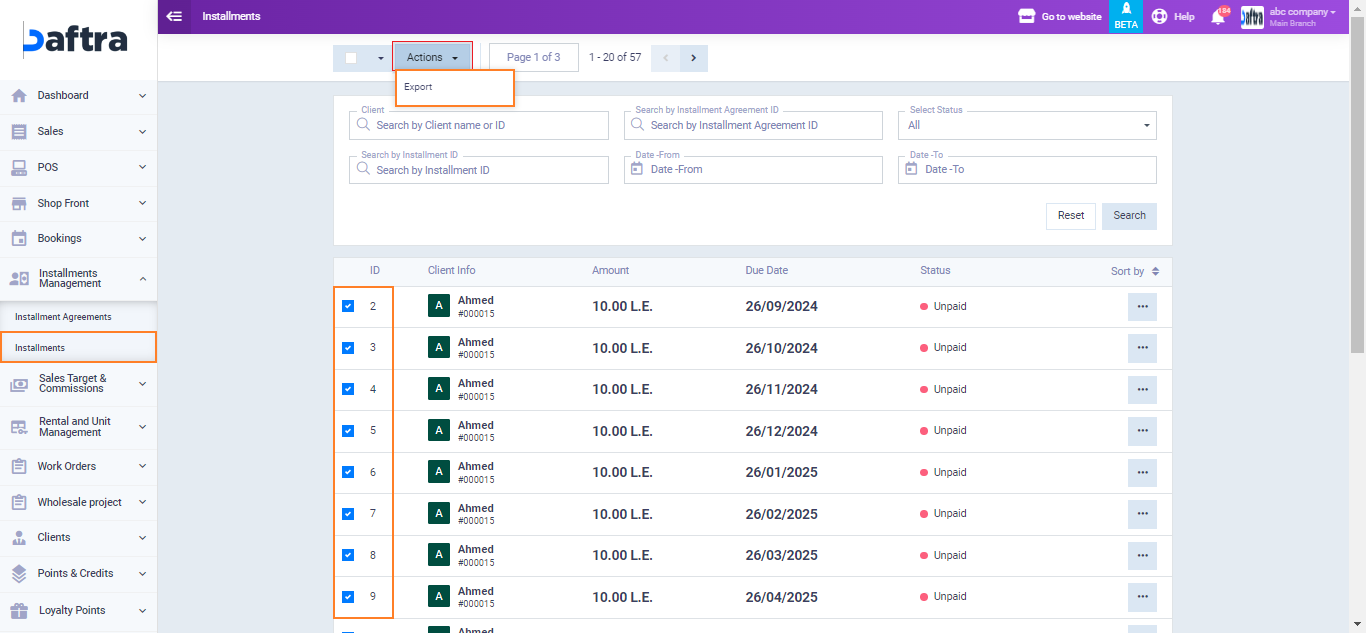
Click on “Installments” under “Installments Management” in the main menu, and select the installments you want to export by checking the boxes next to each installment.
- Note: You can select all installments at once by clicking the checkbox in the top-right corner of the screen next to the “Actions” button.
Click the “Actions” button, and then select “Export” from the dropdown menu.
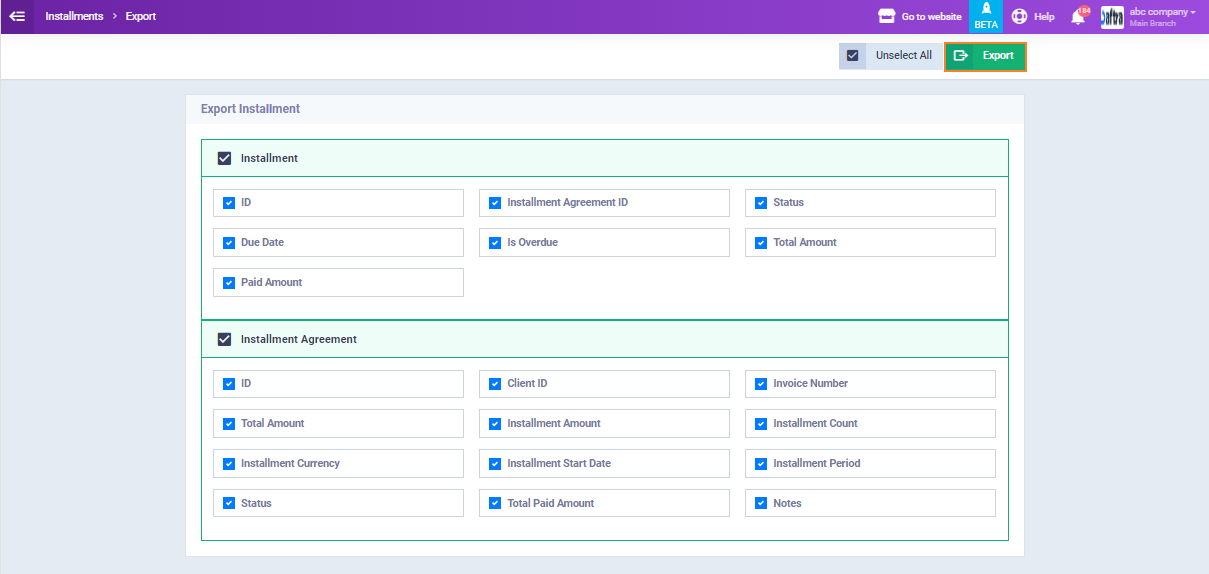
- The system will open a new page displaying all the export options available.
- Note: Since all options are selected by default, you can unselect all of them by clicking the “Unselect All” button.
- Select the options you wish to export by checking the corresponding boxes.
- Click the “Export” button.
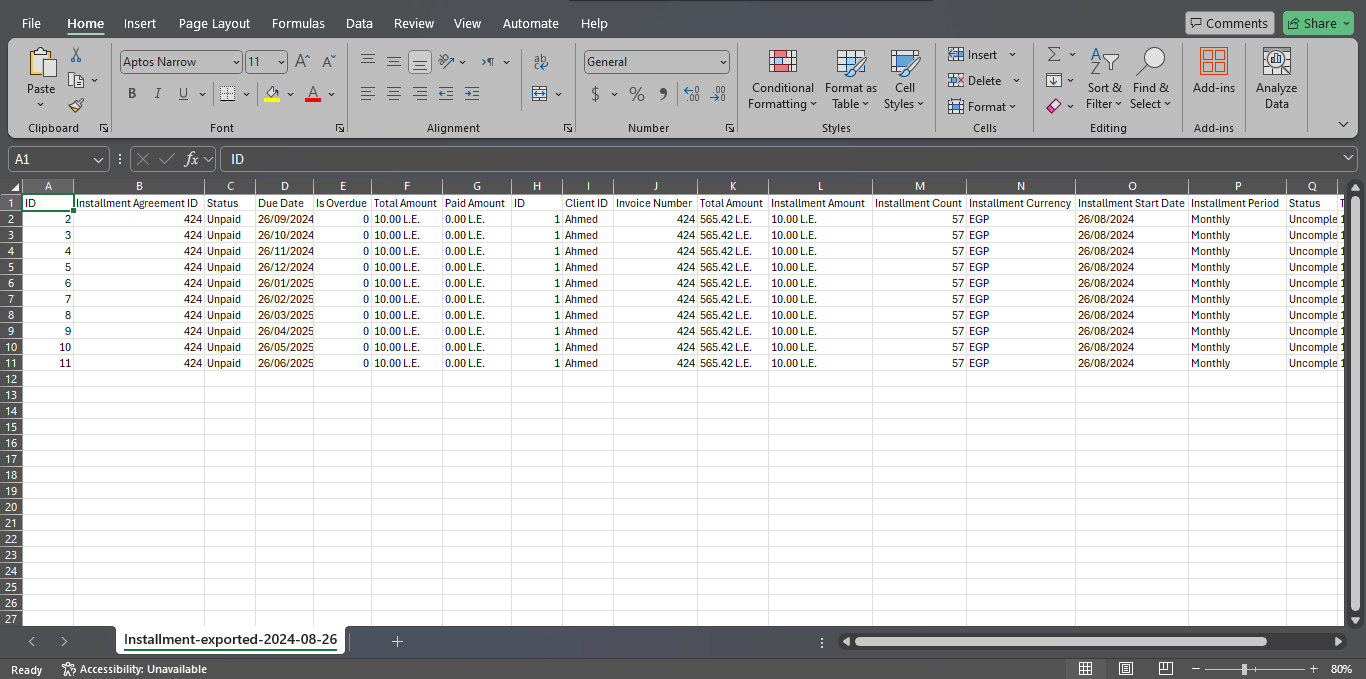
- The system will download a CSV file containing all the data you selected for export.


